Add a footer via the Footer section of the LAYOUT
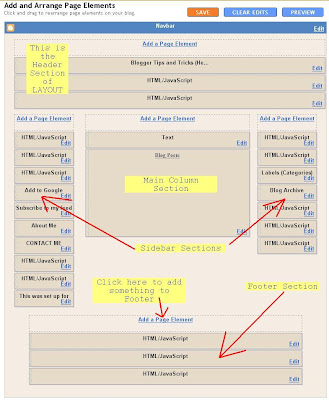
Easiest way to explain is to start with a screen shot of the Blogger LAYOUT:
There are altogether 5 sections, this being a blog with 2 sidebars (3 columns). If yours uses a 2 column (1 sidebar) template, you will have only 4 columns, that is, blog Header, main column sidebar and footer. To answer the question, we only concentrate on the last one - footer section. The red arrow is pointing to a "Add a Page Element" link. To add a footer, just click on "Add a Page Element" and select the type of Page Element you want for your blog.
Add a "footer" via "Add a Page Element" in Main Column Section
What is explained here is a "footer" but not really a footer. It will only be something that appear at the bottom of the main column (where the post or posts are displayed).
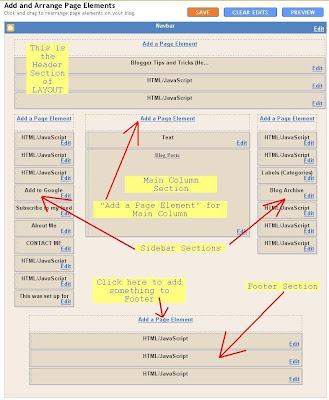
Refer to the topmost red arrow, the one pointing to a "Add a Page Element" link in the Main Column section. If you use a standard Blogger template, you probably wouldn't have this. If you want to add one, refer to How to add a "Add a Page Element" Link for Main Column (post was originally published to show one way of adding a graphic Header, but can be used for any kind of Page Elements).
To add a "footer" in the Main Column, click that "Add a Page Element" link in the Main Column, select the type of Page Element you want in the "footer", save. After saving, you will find a new Page Element at the top of the Main Column section. Just drag the new Page Element to the bottom of the Main Column section, then save the changes.


0 comments:
Post a Comment