New Blogger: Adding a graphic to your blog Header
New Blogger: Adding graphic background to your blog Header (click BACK button to get back to this page).
Special fonts for your graphic Header and without removing the text title
I have found another way to add a graphic header, however a test showed this to be an unsatisfactory way. See Testing adding graphic header. Maybe you can experiment to make the result acceptable, but I don't want to try as the above methods are well acceptable to me. (Note: You will see the blog text title together with the graphic. If you have incorporated the blog text title into the graphic and want to remove the blog text title, in the method described below, you can delete the text from the "Blog Title" field). I will be repeating this test again later when I have the time and either update this post or publish a new one. Also in the example above, you see the graphic extending beyond the boundary of the Header. If you don't want this to happen, you should resize the graphic with a photo editor or use the free and very good Irfanview as described in the post: Using Irfanview photo editor for your blog. Click BACK button to get back to this post. I will probably have to redo this post or do a new post to explain this method better).
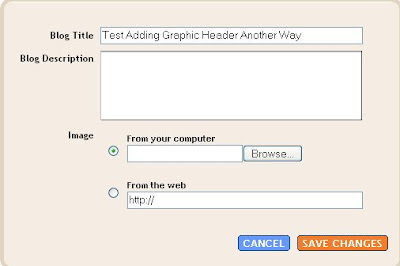
Anyway, if you want to do it, this is the way. First you have to have the graphic saved in your computer or uploaded to the web. Sign into Dashboard. Click Layout for the relevant blog. You will see a Page Element right at the top of the Layout with the title of your blog. Click edit and you will get this pop-up:

Click BROWSE and locate the graphic you have saved in your computer or type in the URL of the hosted graphic on the web. Then click "Save changes".


0 comments:
Post a Comment