uploading photos
First the basic. To upload a photo, sign into Dashboard, select the blog, click the POSTING tab and select either NEW POST or EDIT POST. Then in the post editor, look for the "uploading photo" icon in the toolbar (See screenshot below)
Then click "Browse" (Choose in Blogger Beta) and look for the photo file in your computer. Open that one then select whether you want the photo to be to the none, left, right or center of your post. If you select left or right, you will have less control over how the text and the photo in the post will be displayed. You may see it displayed in one way in the preview, but when you publish it, it may appear different. Choosing center will give a better control over the connection between text and image. Selecting NONE will enable you to paste your photo in whichever part of the post, even in the middle of a sentence in a text. Look at the image of Highlight icon in this post What is FireFox and why you should be using it. The small image (of the tip of a highlight pen) is displayed in the middle of a sentence near the bottom of the post.
If you want the image to be displayed to the left or to the right of the post, it is best to select "small", then after uploading the image, cut and paste the image HTML immediately before a paragraph, like the photos you see in this post: Penang: Places of interest. You will have better control of how your text and image appear together. Pasting the image HTML in the middle of a paragraph.
Then select whether you want the photo to appear small, medium or large, and finally click "upload image".
What you will then see will depend on whether you are in the EDIT HTML mode or COMPOSE mode of the post editor:
Whichever mode you are in, you will see the "photo" at the very top of the post. If you are in the COMPOSE mode, you will see the actual photo, but if you are in the EDIT HTML MODE, you will see the HTML for the photo, which will appear something like this:
| <a onblur="try {parent.deselectBloggerImageGracefully();} catch(e) {}" href="http://photos1.blogger.com/blogger/5611/753/1600/ upload%20photo.jpg"><img style="display:block; margin:0px auto 10px; text-align:center;cursor:pointer; cursor:hand;" src="http://photos1.blogger.com/blogger/5611/753/400/ upload%20photo.jpg" border="0" alt="" /></a> |
Note: At the bottom of the code, you will see this alt="". It is good to fill in the space between the quotation mark with a description of the photo. This is both for the purpose of those who for some reasons are unable to see the photo, who will then see the alternate text, and for the search engines which do not see the photo, but read the alt"" text. Important. You need to ensure that you are in the INSERT mode when you do this, otherwise, you will overwrite part of the HTML. It may be a good idea to open Notepad and test this first.
Manipulating the photos
To move the photos, there are 2 ways. If you are in the COMPOSE mode, you just grab the photo with your mouse and drag it to where you want it to be. If the position is way down the post, you may have to do this a couple of time. In the EDIT HTML mode, it is easier. All you have to do is to highlight the HTML code for the photo, right-click, select cut, and paste it where you want the photo to appear in your post.In the COMPOSE mode, you can also manipulate the size of the photo. Just grab the corner of the photo and drag it till you get the size you want. You may also grab and drag the side of the photo, but the aspect ratio will not be preserved.
Problems uploading photos
Bloggers often complain of being unable to upload photos. Either they are made to wait for eternity, or the message DONE appears, but when clicked, no photos are in sight. For problems like this, you can try changing browser. Look at post What to do when you can't publish or upload photos, etc.. (Please note that while FireFox is best for uploading images, the recommendation is to change browser when facing problem, which means that if you are already using FireFox, then change to IE or Opera)Other ways of uploading photos to Blogger
There are also other ways to upload photos. You can use external photo hosts like Photobucket. You will have to start an account with them, and once you have done that, you can upload your photos, and then use the uploaded photos to post to you Blogger blog. You will have to use the <img src="URL of the photo" alt="XYZ" width="W"> tag where XYZ is a brief description of the photo and W is the width of the photo you want to display. This width W must be less than the width of the main column. You can leave out the height="H" attribute and the height will automatically be adjusted to make the aspect ratio constant and the image undistorted.You can get the width of the main column by clicking TEMPLATE > EDIT HTML to get the template editor window, then look for this block of codes:
#main-wrapper {
width: 400px;
margin-left: 20px;
float: left;
word-wrap: break-word; /* fix for long text breaking sidebar float in IE */
}
This is for the template of this blog. Yours might be slightly different. Anyway, this tell me that the width of the main column is 400 pixels and the HTML tag for the photo should then be
<img src="URL of the photo" alt="XYZ" width="395"> or less.
To get the URL of the photo, when you are logged into Photobucket, you just highlight the URL as shown in the screenshot below:
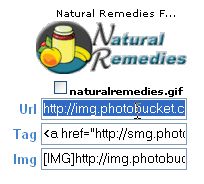
Alternatively, if you are too lazy to type in the
The only thing to remember when hosting photos with external photo hosts, the photos will remain only as long as that photo host remain in business. Further, in Photobucket case, there is a requirement that you log in at least once in 3 months, otherwise your account may be deleted, along with your photos. For me, I prefer to host my photos with Blogger. Update: from correspondence with Photobucket, there is no longer a requirement for you to sign in every 3 months, but they said they reserve the right to delete inactive accounts
If you use HTML and you want to be able to manipulate the photos a little more, you can learn how to by going to W3schools. HTML Images.
UPDATE: 11 October, 2006
I made a mistake. I titled this post as "Uploading and manipulating photos on Blogger (and Blogger Beta)". I assumed that since the post editor window is the same in Blogger classic and Blogger Beta, everything will also be the same. But anyway, today I decided to do a test. The report is in this post: Testing manipulating images in Blogger Beta. Resizing and repositioning images in the COMPOSE mode does not work in Blogger Beta. If you want to reposition, you will have to use the method in the EDIT HTML mode as described above. If you want to resize, you will have to add the attributes height="" width="" in the <img> tag. The title of this blog should be "Uploading and manipulating photos on Blogger". However, changing the title means changing the URL to this post (permalink) and this post have already been indexed by the search engines. I don't want the links in their SRP (search result page) to become dead links. Anyway, this has been reported to Blogger support, and I hope they fix that. If I hear from them, or if I find the bug fixed, I will post a further update.
Related post: Uploading and manipulating images Part 2 (click "BACK" button to get back to this page).
| NEWER POST | OLDER POST |


0 comments:
Post a Comment